Stained Glass Windows
Creating a Stained Glass Window with Peelable Glass Paint
Stained glass windows are beautiful and can add a touch of class and elegance to a home, or shed! They can also be pretty expensive to buy or create so an easy cheat is to re-create a stained glass window look with Thorndown Peelable Glass Paint.
Glass Paint comes in a range of 14 translucent or 24 opaque colours and they can be mixed together to create different shades and colours, or increase translucency by adding Clear. Simply paint on the glass and outline a frame and shapes in black Peelable Glass Paint for a more authentic stained-glass look.
It is water-based, non-toxic, has minimal VOC (Volatile Organic Compounds) and is made from a 100% already recycled plastic resin.
Thorndown Peelable Glass Paint can be used by everyone young and old, and you don’t have to be a talented artist to give it a go. Stained glass designs can be anything from a single flower to geometric shapes and patterns such as squares or diamonds. Using stencils is a nice easy way to paint effective and impressive designs and can be easily bought online or from art shops.
And if you do make a mistake or don’t like what you’ve painted either wipe it off if the paint is still wet, or wait for it to dry, peel it off and start again!
Creating a Charles Rennie Mackintosh-style Stained Glass Window
To start, mask out the edges and border design with tape. We found that Frog Tape worked best as it is designed to minimise paint bleed under the tape. Just make sure to press down firmly along both edges to ensure a firm seal. The tape is also created so that the glue doesn’t leave a sticky mess behind when it’s removed.
You only need a small amount of Thorndown Peelable Glass Paint on your paint brush as it goes a long way. Dip it in and spread it thinly. The Glass Paint dries quickly so it can be best practice to work on a small area at a time and peel off the tape while the paint is still wet so you don’t peel off the paint too!
Once the framework is in place, paint the outlines of the leaves and and flower head in the same Bat Black Peelable Glass Paint as the border lines.
Then add the colours within the borders, filling in your picture to complete your design. Use a small, soft art paint brush and apply a small amount at a time, spreading it out across the glass. Your design will quickly grow into a beautiful creation that you can enjoy for months or years, then when you want a change just peel it off and paint something new.
Translucent colours are designed to leave a thin coating that allows the light to shine through. You will see brush marks when viewed from the inside with the coating looking more opaque when viewed from outside. If you want the coating to look more opaque then just apply a second coat, painting within your existing edges and framework.
Designs can be as complex or simple as you like and simple designs can be very effective and impressive. If you’re not great at painting freehand then try incorporating stencils into your design, or looking for inspirational images to copy from books or the internet.
If you are a stained glass artist then you can use Thorndown Peelable Glass Paint to try out your designs before creating them in glass.
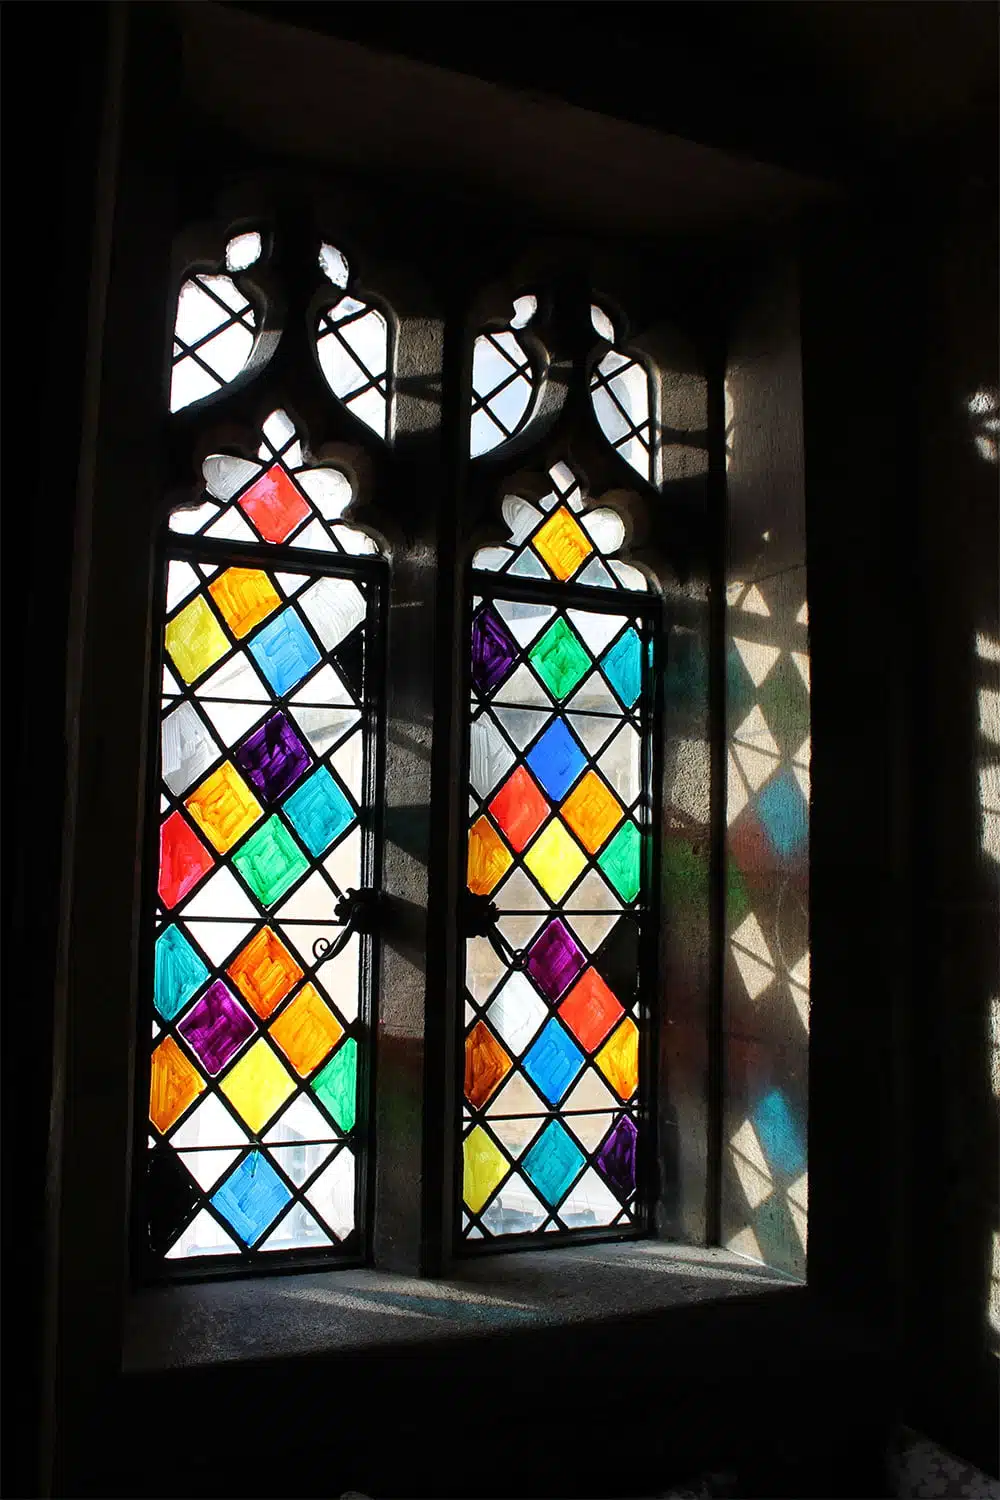
Peelable Glass Paint was used on the windows of this Grade I listed medieval monument. On one window a variety of opaque colours were painted on creating an attractive heritage pattern. The double window was painted in a variety of translucent Peelable Glass Paint colours giving it a traditional stained glass look. When the sun shone through the windows a beautiful harlequin pattern was reflected on the stone window surrounds and window sill.
It was really easy to remove each of the coloured coats on the panes of window, by picking at corners and peeling off the sheets, although after removal the room looked a lot colder and bare!


