Decorative Greenhouse Shading
Decorative Greenhouse Shading With Peelable Glass Paint
All gardeners know how important it is to shade greenhouses from spring through to autumn to protect plants from overheating. Traditionally greenhouse shading has been a pain of a job and quite unsightly, however those days are over!
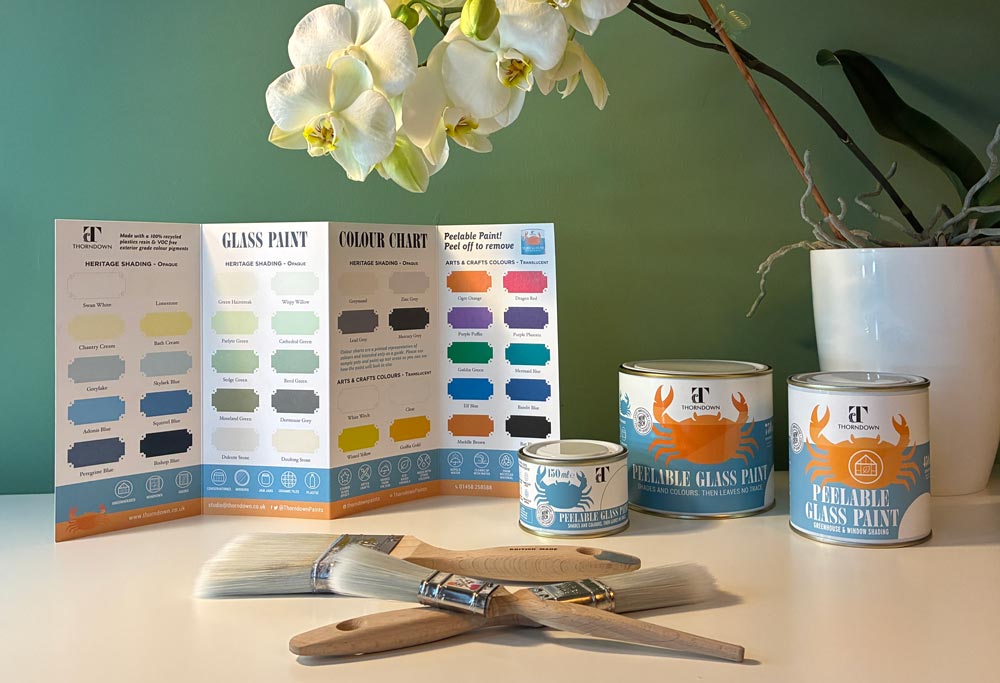
With Thorndown’s Peelable Glass Paint you can choose from 24 opaque colours in heritage tones from off-whites, creams, blues, greens and greys, or 14 translucent colours in a range of bright, primary colours perfect for decorative shading and arts & crafts.
For maximum greenhouse shading use an opaque heritage paint colour or Swan White, which is now also available in a handy 450ml tin. One coat is all that’s needed to provide shading from the sun but in areas of heavy exposure and direct sunlight you can paint 2 coats on. It’s so easy to apply and remove that if the sun wanes for a sustained period of time, just peel off some panes to let more light through and re-paint when the sun strengthens again.
The opaque colour range was created to match heritage tones from the Thorndown Wood Paint Colour Chart so you can shade your greenhouse in the same colour as you paint the wood.
But shading your greenhouse doesn’t just have to be practical. With stencils or a bit of imagination you can make it beautiful too.
Making Greenhouse Shading Fun – Stencilling
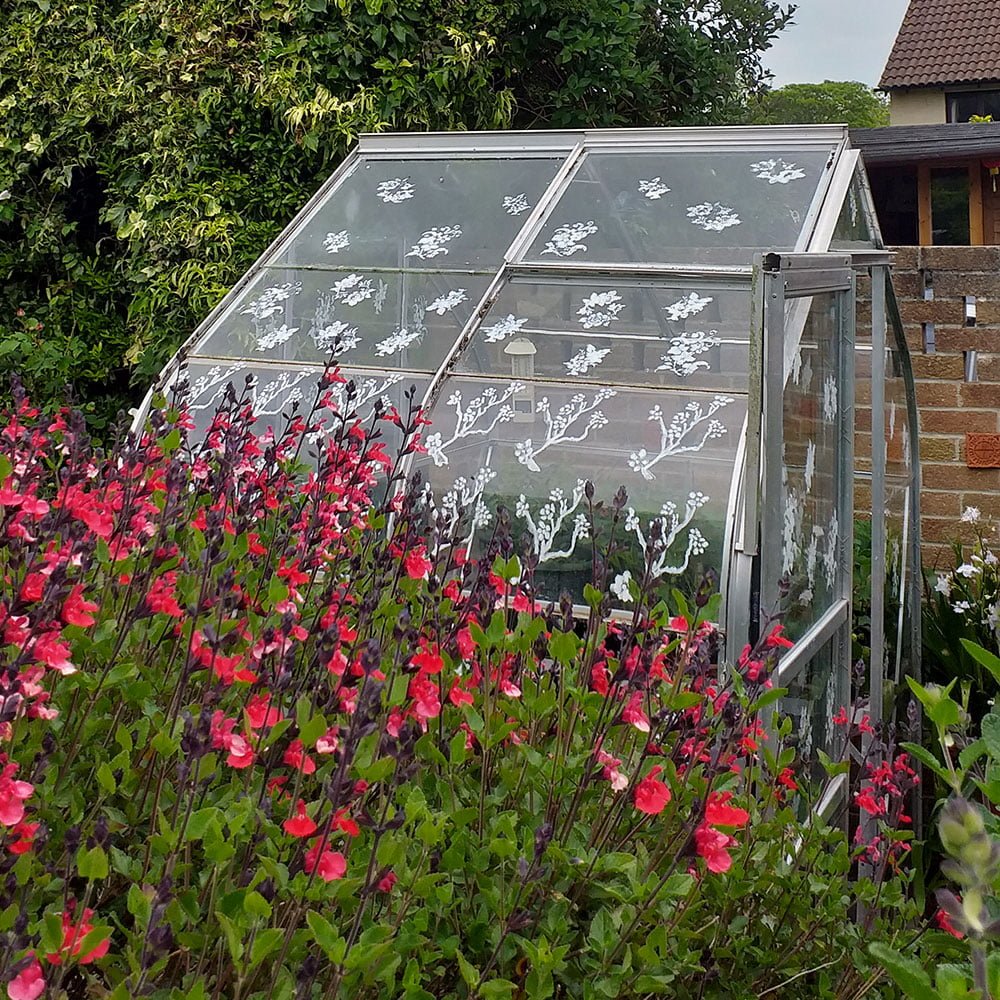
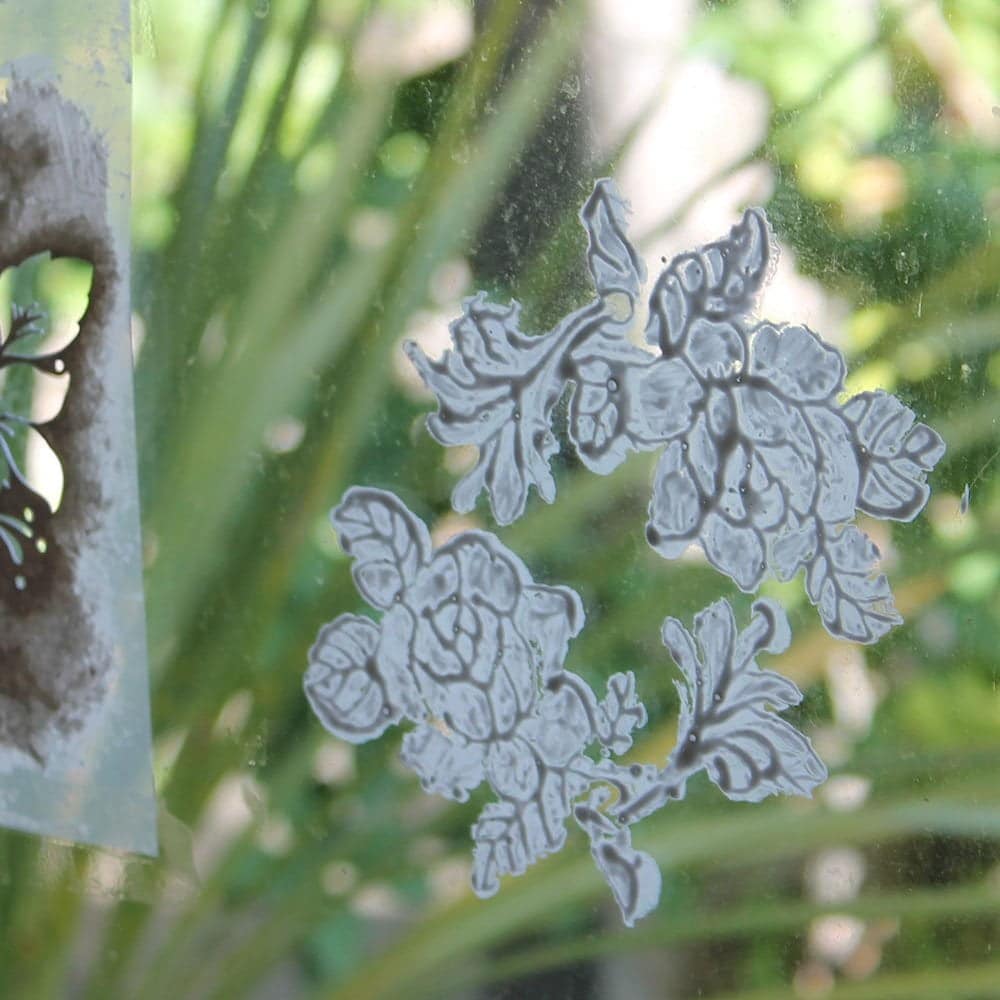
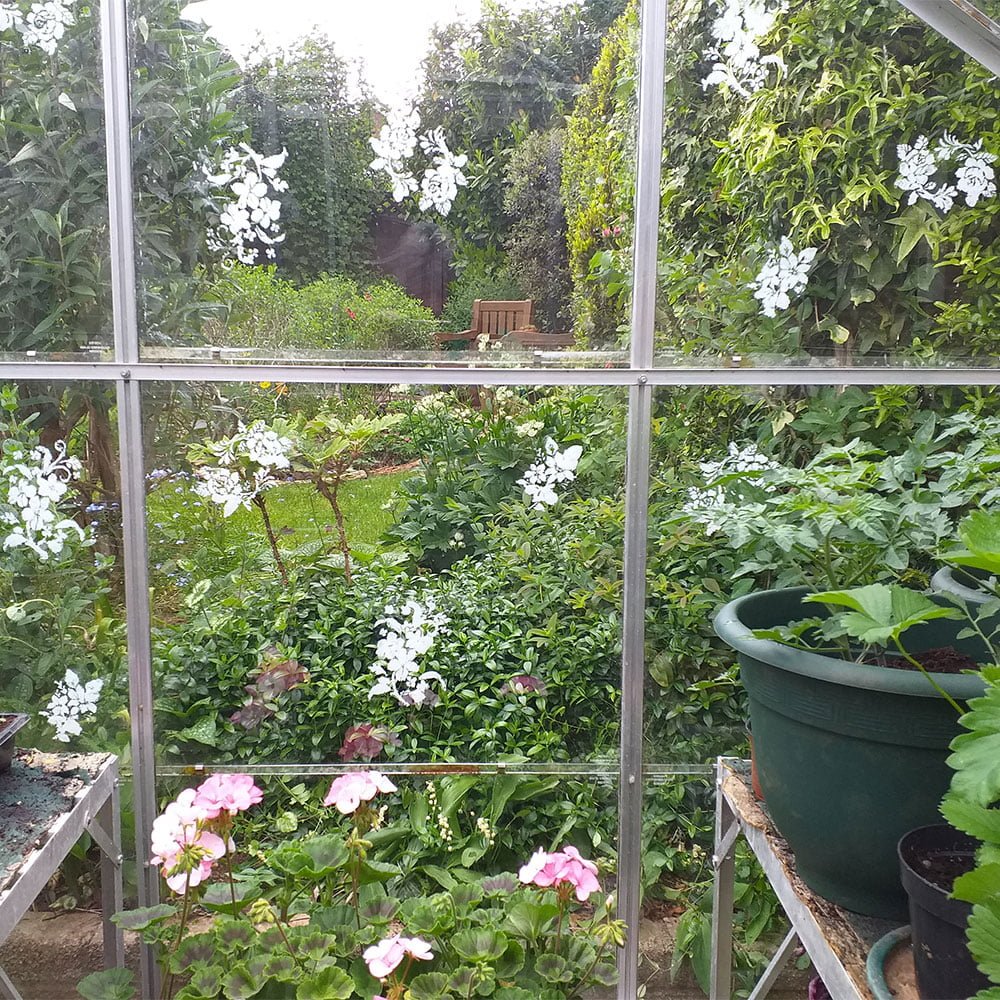
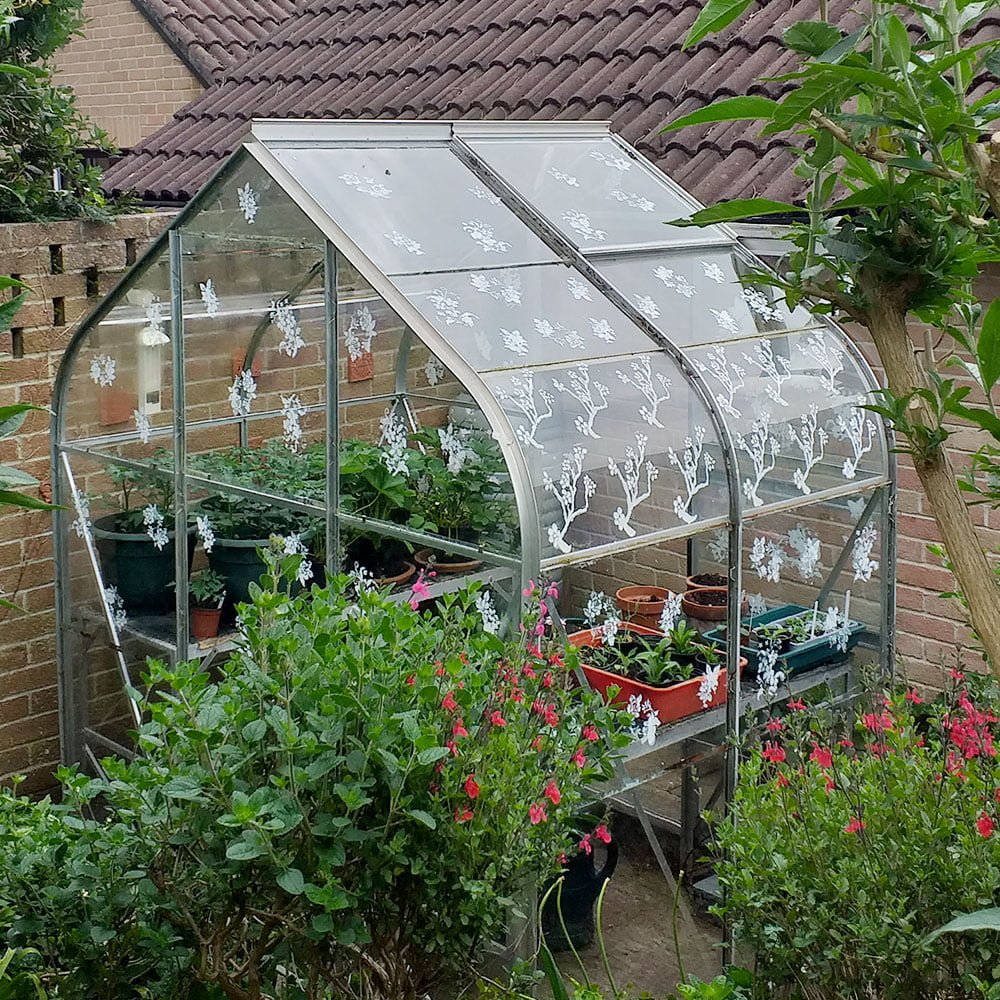
One of our customers wanted to make her greenhouse pretty and didn’t need full shading yet, so turned to stencils instead. Using Swan White opaque Peelable Glass Paint and four floral stencil designs, she has transformed her greenhouse into a pretty glass building sitting in the garden surrounded by beautiful brimming boarders.
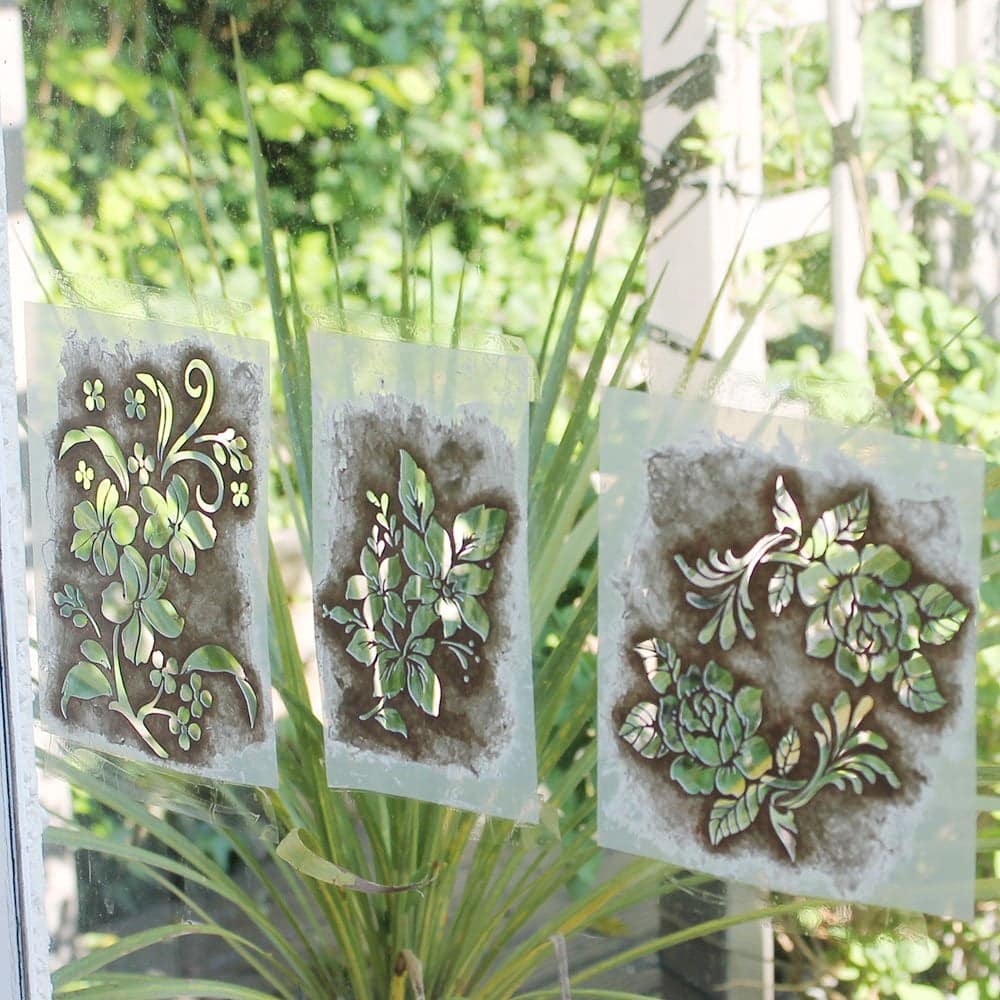
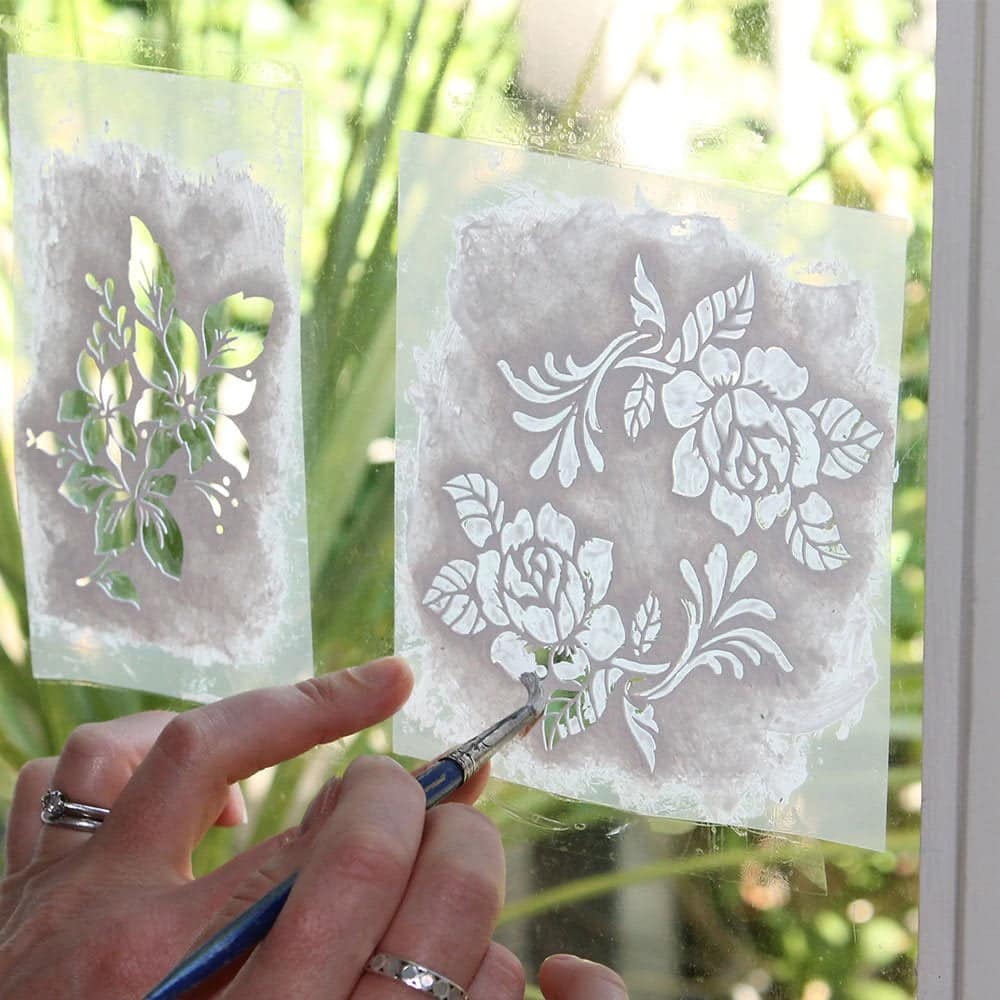
Stencilling is a very satisfying thing to do creating instant results. Getting the technique right though can be challenging and take some experimenting as the technique varies depending on the size and nature of the stencil, and the end result you want.
The technique this customer employed was to fix the stencil in place, flat on the glass with tape. She then put blobs of paint in the corners and used an art brush to wipe small amounts of paint over the stencil and onto the glass. For fine stencils like these you only need a small amount of paint to create the design without bleeding under the stencil.

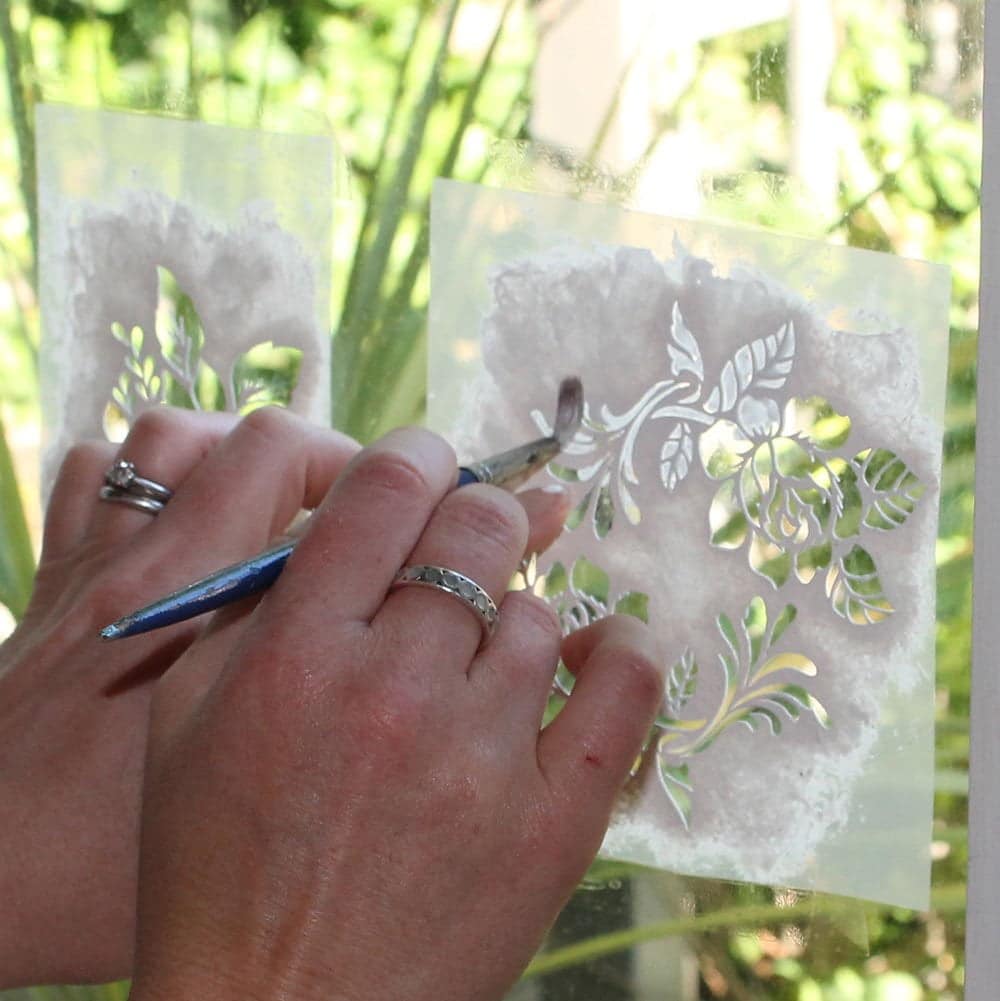


Working carefully the design is quickly filled in, but take time and make sure to keep the stencil as flush as you can to the glass to minimise bleeding. When it’s done carefully remove the stencil while the paint is still wet so you don’t take any dried paint off with it.
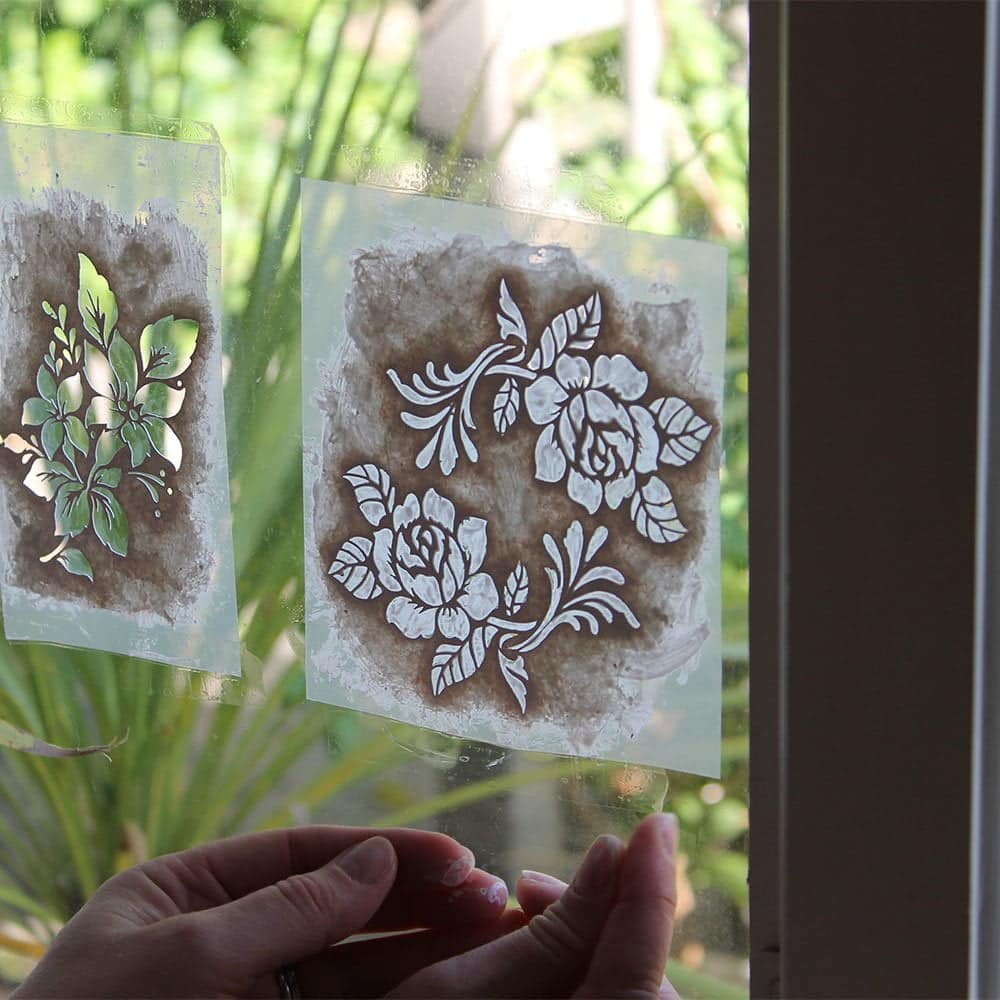
The stencils can be used again and again and the paint goes a long way. Use this technique to create partial shading, decorative screening from unsightly tools and equipment, or just to create something really pretty!
Modern Art
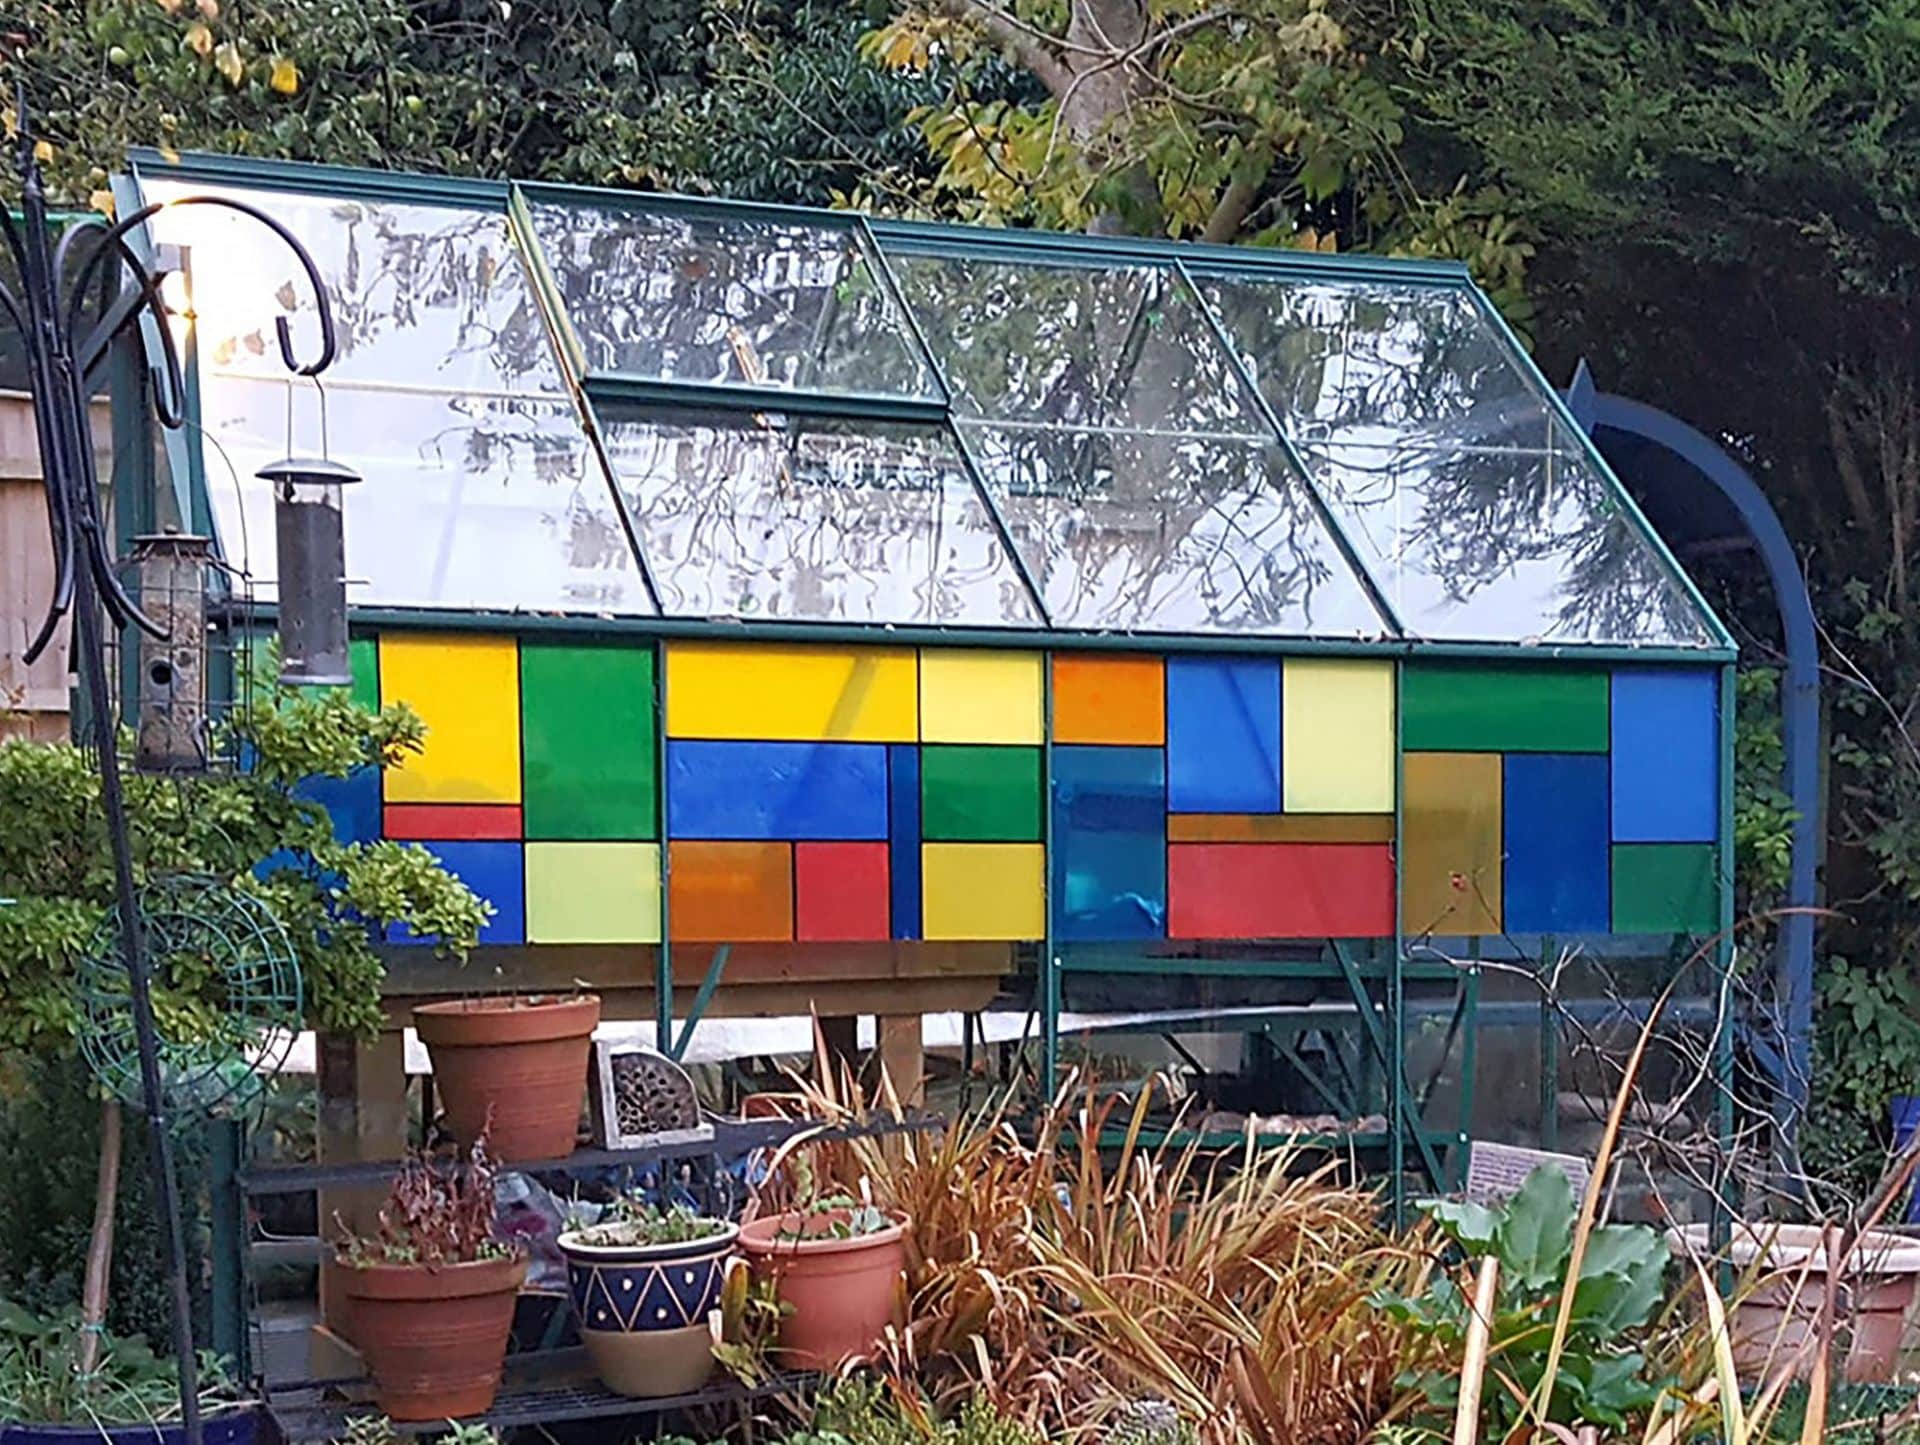
Another customer created a beautiful art deco stained glass effect greenhouse the looks simply stunning! A work of art that shades, adds colour to the garden and hides empty pots and seed trays waiting to be used in spring.
Linda took the glass panes out and thoroughly cleaned them with soapy water then left them to dry. A couple of panes had a strong residue on it that was repelling the glass paint so she rinsed thoroughly with water to remove the odd film.
She then used a roller to paint on a variety of colours from the translucent colour range, turning her greenhouse into a work of art.

Matching Wood Paint & Peelable Glass Paint Colours
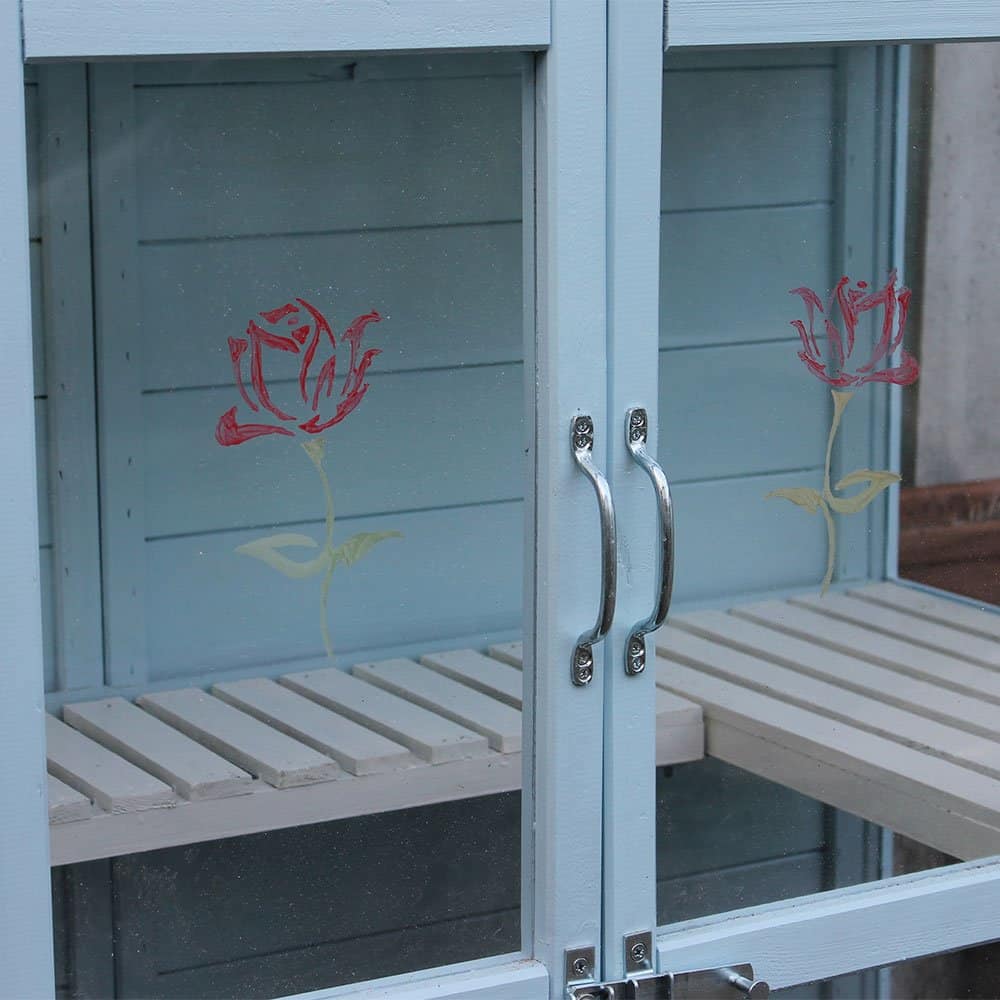
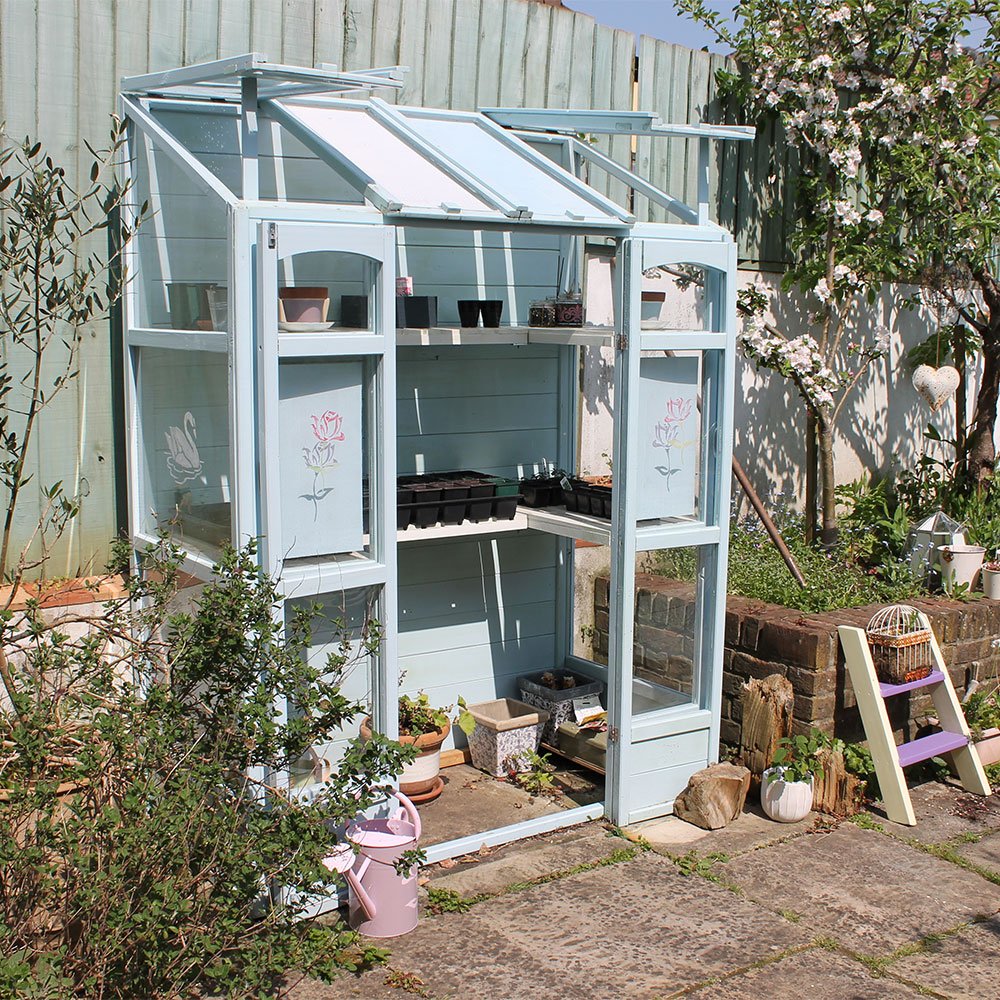
We painted the timber frame of this beautiful Forest Victorian Tall Wall Greenhouse in Skylark Blue Wood Paint and the shelves in Limestone to contrast. Next I painted on Skylark Blue Peelable Glass Paint and Swan White to the roof panes. Such a pretty greenhouse needed some pretty stencil decorations. The swan is painted with Swan White and the roses with Dragon Red and stems in Reed and Moorland Green.

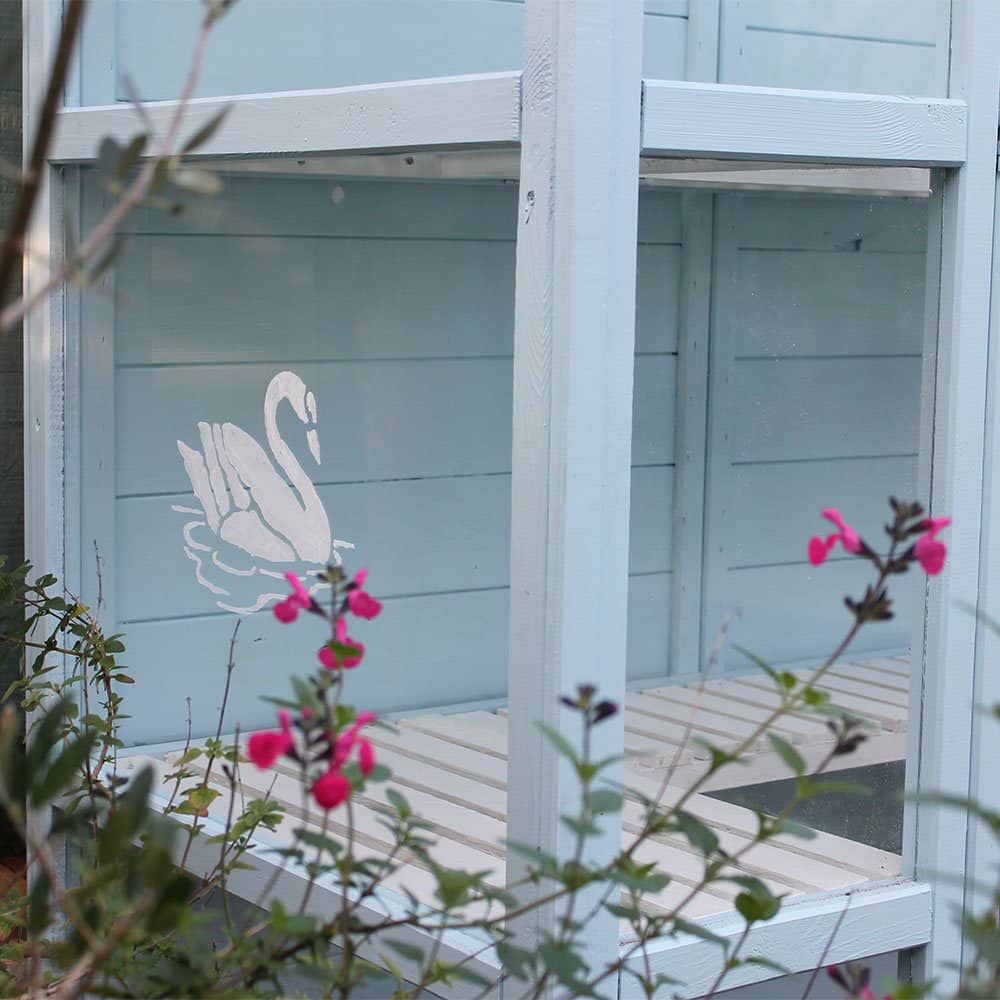

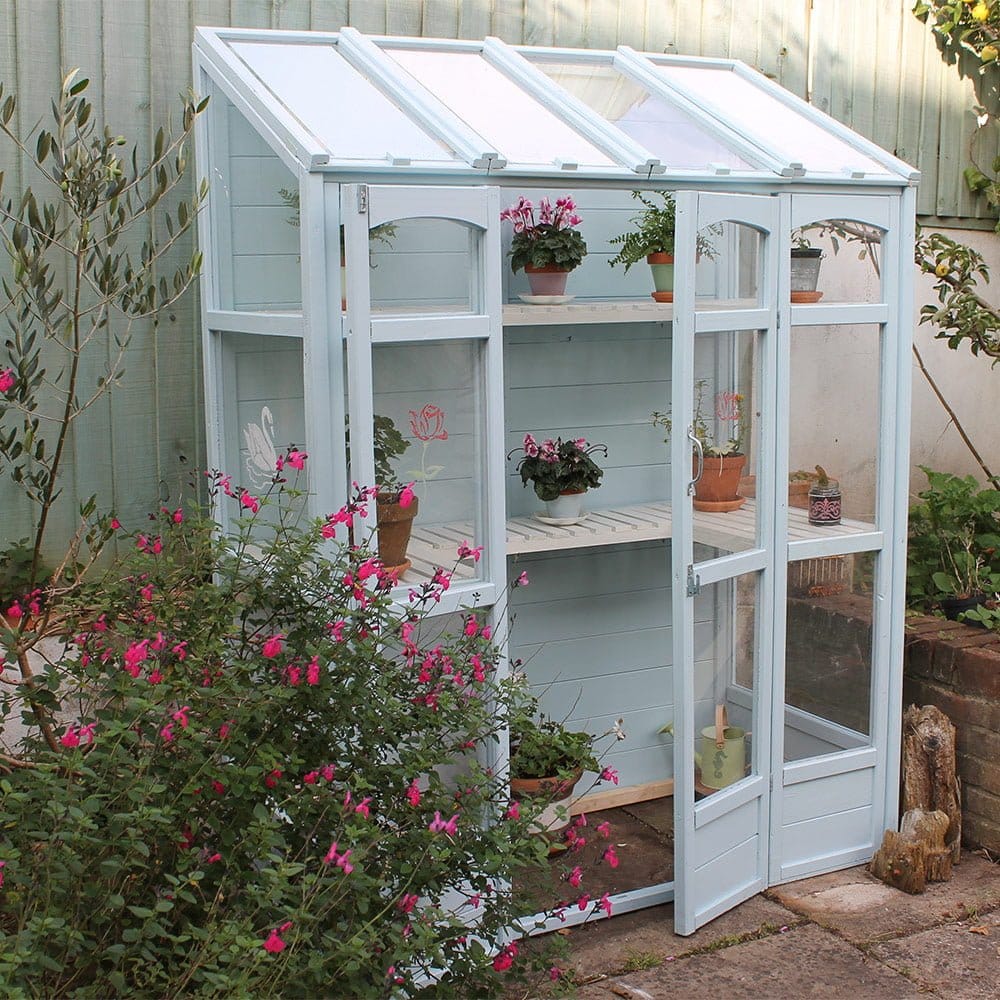
The finished result looks beautiful in the garden all year round and the colours cheer you up through the winter months. As the intensity of the sun increases you can also quickly and easily add shading to more panes.

Masking Borders
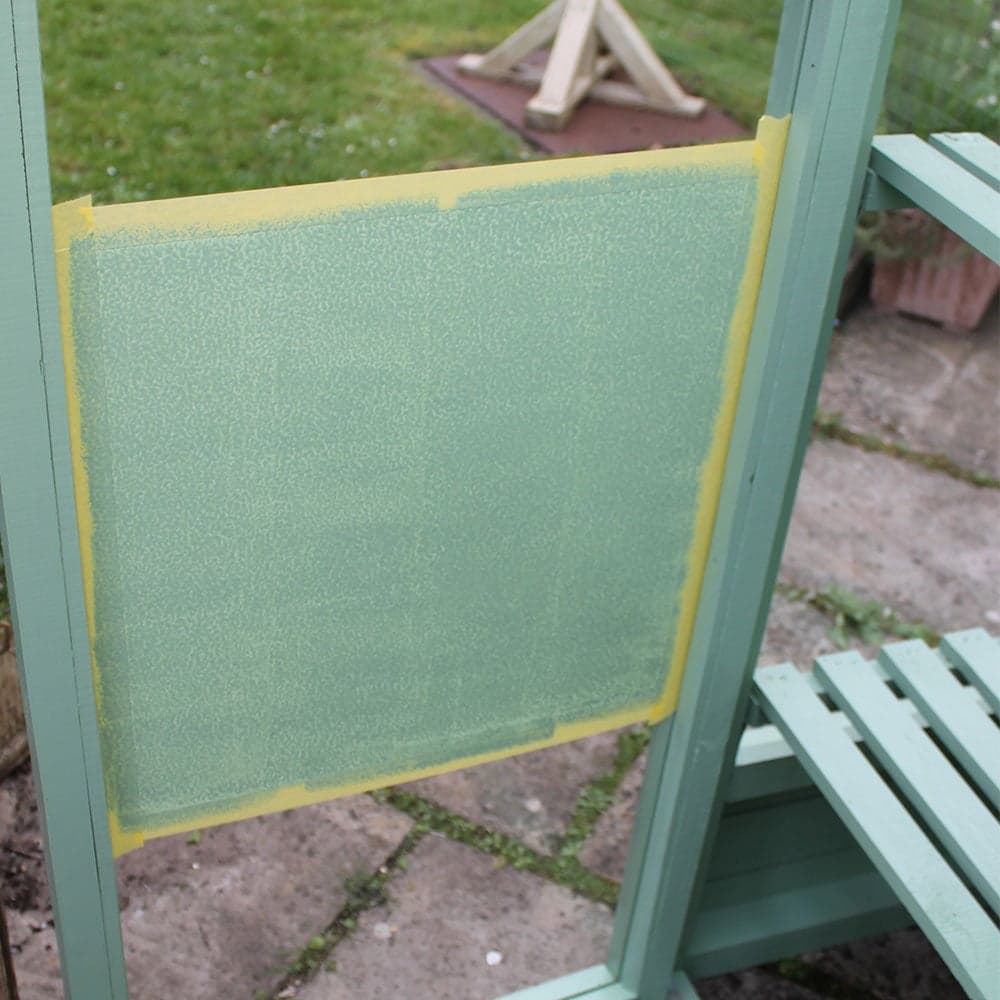
An easy way to make really neat and decorative shading panels is to mask the outline of the window pane with masking tape. I find using Frogtape gives a really good result as it is low tack but produces a really good seal to the window minimising paint bleed.
On this Forest Mini Greenhouse I painted the wood with Thorndown’s Reed Green Wood Paint, then painted shading panels of Reed Green Peelable Glass Paint on the front and Swan White Peelable Glass Paint on the roof panels.
I applied Frogtape strips around the borders of the roof window panes pressing down firmly to create a tight seal. Next I painted on the Peelable Glass Paint with a roller then removed the tape straight away before the paint started drying. For best results pull off the tape at a diagonal angle away from the paint and don’t leave the tape on too long or the paint will have started to dry on it and will be torn off with the tape.
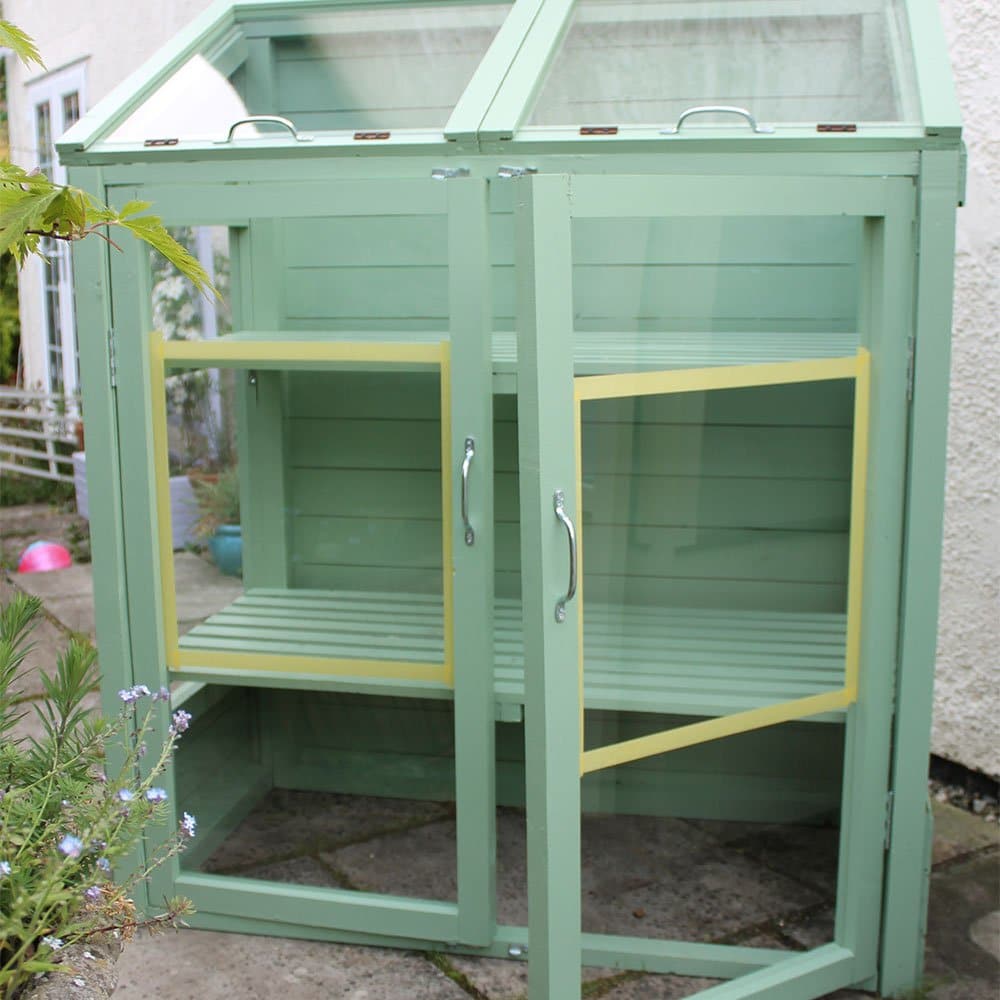
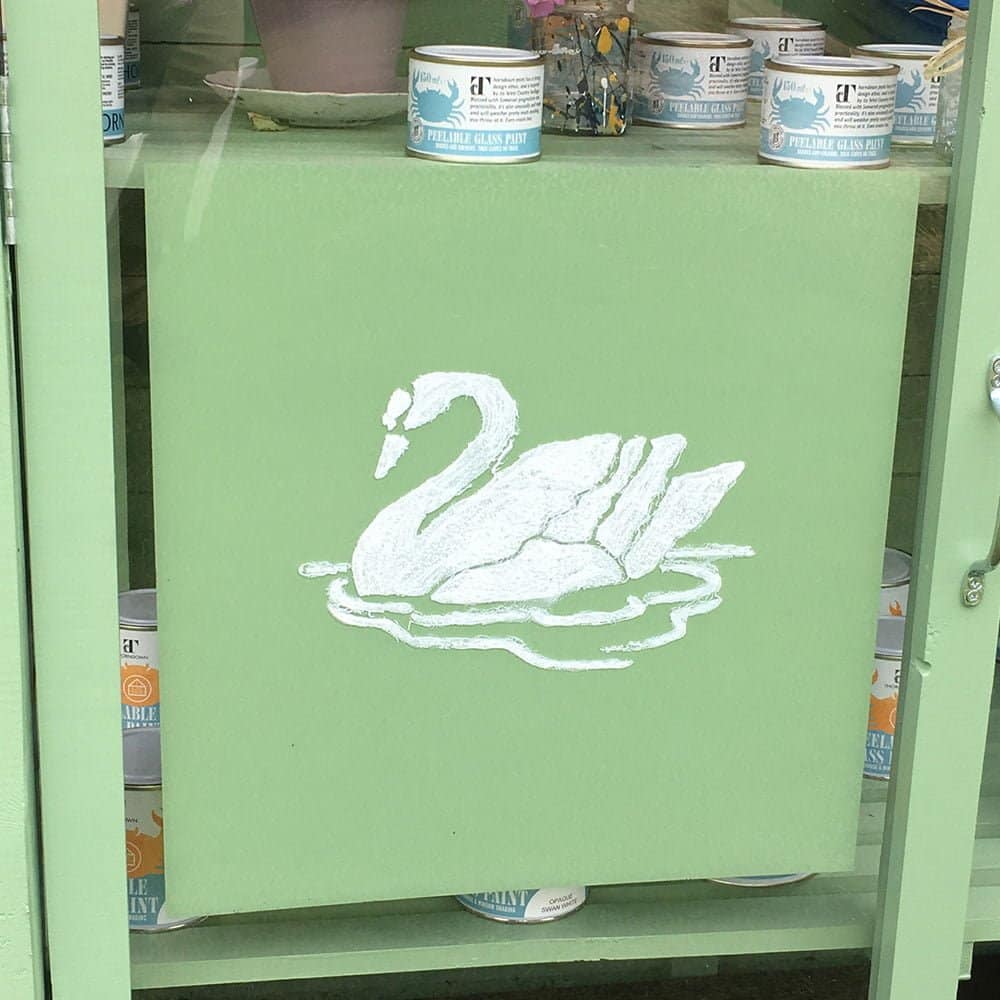
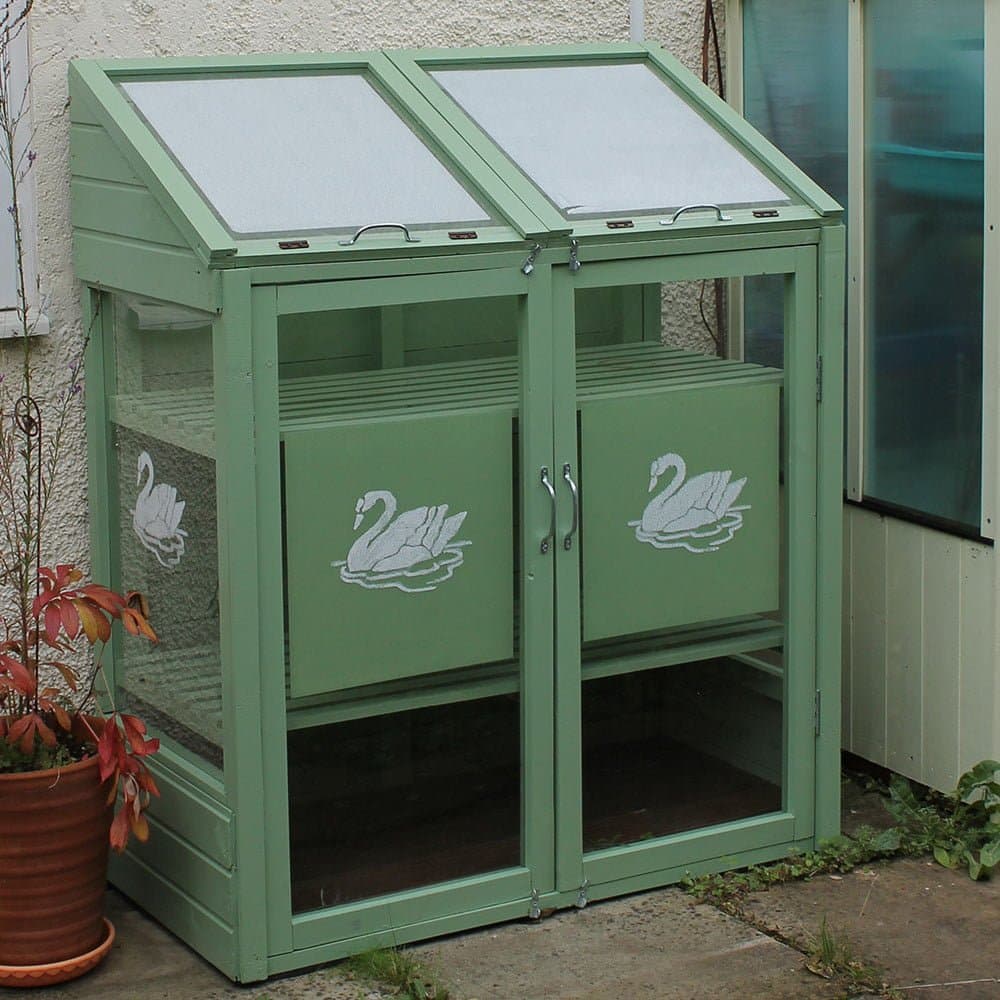
The shading panels were painted on the insides of the plastic perspex window panes but you can paint it on the exteriors too. On the door panels I split the door height lining up the horizontal tape lines with the shelves to create bold squares. Next I painted on decorative swans to the outside using the roller that I’d used for the Swan White shading panels on the roof and a swan stencil.
A roller holds a lot of paint in it and when stencilling, less paint is best so using a roller sleeve that had already been used to paint on the shading panel meant I had the perfect amount of paint on it to roller over the stencil and leave a perfect swan without paint bleed.